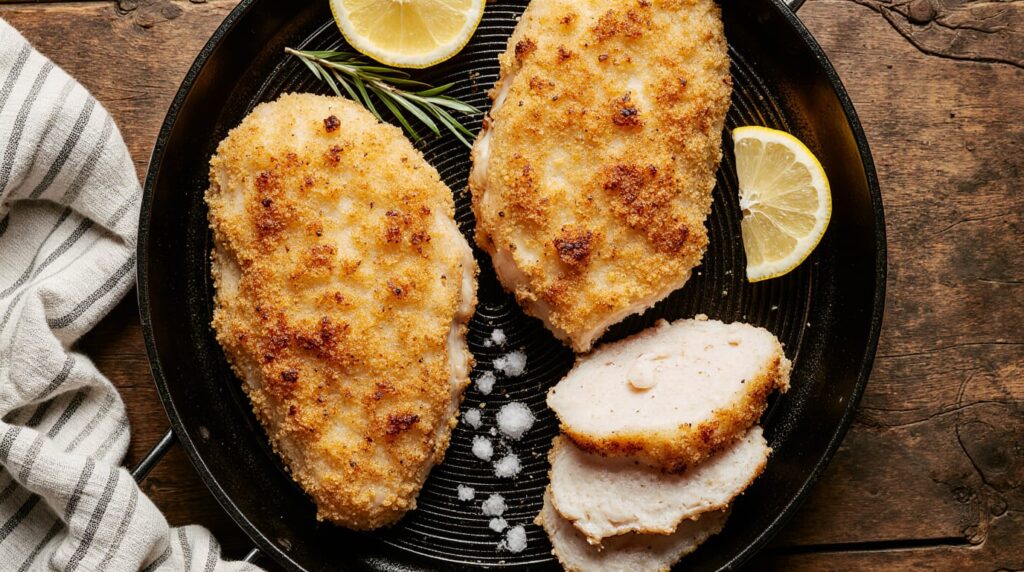
You know that feeling when you walk into an Italian grandmother’s kitchen? The air is warm, fragrant with garlic and herbs, and there’s always a platter of golden-brown, impossibly crisp chicken cutlets resting on the counter. They’re thin, they’re juicy, and they have that magical crust that shatters when you cut into it. For years, I thought that level of perfection was a family secret, passed down through generations and locked away in old recipe boxes.
My early attempts at a chicken cutlet recipe were… well, let’s call them learning experiences. I’d end up with burnt breading and raw chicken, or cutlets so dry they could double as hockey pucks. The breading would fall off in the pan, or the chicken would curl up into a sad, uneven little pouch. I was about to resign myself to mediocre cutlets forever.
Then, I worked a stint in a busy Italian-American restaurant kitchen. I watched the cooks move with a rhythm—pound, dredge, fry, rest. They weren’t using magic; they were using technique. And once I learned those techniques, everything changed. This chicken cutlet recipe is the culmination of all those lessons. It’s your blueprint for cutlets so good, they might just start a family tradition of your own.
Table of Contents
What Exactly Is a Chicken Cutlet? (And Why It’s a Weeknight Hero)
Before we dive into our chicken cutlet recipe, let’s clear up what we’re making. A cutlet is a thin, tenderized slice of meat—in this case, chicken breast—that’s coated in breading and quickly cooked. It’s the star of dishes like chicken Parmesan, chicken Milanese, and the beloved chicken cutlet sandwich.
Why mastering this recipe is a game-changer:
- Unbeatable texture: The contrast of a crisp exterior and tender interior
- Quick cooking: Thin cutlets cook in minutes, perfect for busy nights
- Endless versatility: A blank canvas for countless sauces and cuisines
- Crowd-pleaser: Universally loved by both kids and adults
- Meal prep friendly: Cooks and reheats beautifully
According to the National Chicken Council, chicken is the most popular protein in the United States, and for good reason—it’s affordable, lean, and incredibly adaptable when you know how to handle it properly.
The 3 Pillars of Cutlet Perfection: A Science-Backed Approach
Through all my testing (and yes, a few failures), I’ve found that three principles non-negotiable for the perfect chicken cutlet recipe. The Institute of Food Technologists confirms that these techniques are grounded in food science, not just old wives’ tales.
1. The Pound (Even Thickness is Everything)
Uneven chicken cooks unevenly. Pounding ensures every part of your cutlet is the same thickness, leading to uniform cooking—no more raw thick parts and overcooked thin edges.
2. The Breading Station (The “Glue” Matters)
The classic three-step dredge (flour, egg, breadcrumbs) isn’t just tradition; it’s chemistry. Each layer serves as an adhesive for the next, creating a durable, crisp crust that stays put.
3. The Rest (Patience is a Flavor)
Letting breaded cutlets rest before frying allows the coating to set. This prevents the breading from absorbing too much oil or sliding off during cooking.
Gathering Your Ingredients: Why Quality Counts
The beauty of a great chicken cutlet recipe is its simplicity. You don’t need fancy ingredients, but the quality of your basics makes a world of difference.
The Chicken:
- 2 large boneless, skinless chicken breasts (about 1.5 lbs total)
- Why it matters: Look for plump, even-sized breasts. I sometimes buy a whole pack and freeze what I don’t use for recipes like easy chicken soup.
The Breading Station Trio:
- 1 cup all-purpose flour
- 2 large eggs
- 1 ½ cups fine breadcrumbs (Italian-seasoned or plain)
- ½ cup grated Parmesan cheese (mix into breadcrumbs for extra flavor)
The Flavor Boosters:
- 1 teaspoon garlic powder
- 1 teaspoon kosher salt (plus more for seasoning)
- ½ teaspoon black pepper
- ½ teaspoon paprika (for color and subtle sweetness)
For Cooking:
- ½ cup neutral oil (like vegetable, canola, or avocado oil)
- 2 tablespoons unsalted butter (optional, for added flavor and browning)
Your Foolproof, Step-by-Step Chicken Cutlet Recipe
Step 1: The Butterfly and Pound
Place one chicken breast on a sturdy cutting board. Place your hand flat on top. Using a sharp knife, slice horizontally through the middle, starting at the thicker end, to butterfly it open like a book. Don’t cut all the way through—leave about ½ inch attached, then open it up.
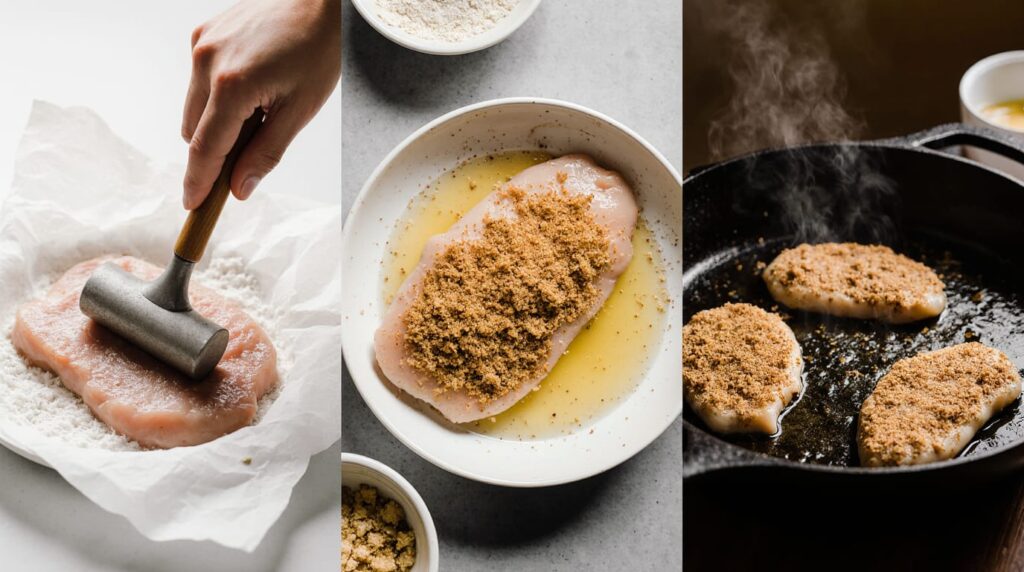
Place the butterflied breast between two sheets of plastic wrap or parchment paper. Using the flat side of a meat mallet (or a rolling pin, or even a heavy skillet), pound from the center outward until the chicken is an even ¼-inch thickness.
Pro tip: Start gently! You’re tenderizing, not pulverizing. Even thickness is the goal.
Step 2: The Seasoning
Season both sides of the pounded chicken generously with salt and pepper. This is your chance to season the meat itself, not just the breading.
Step 3: Set Up Your Breading Station (The Holy Trinity)
Get three shallow dishes (pie plates or wide bowls work perfectly).
- Dish 1: Flour, mixed with garlic powder and paprika.
- Dish 2: Beaten eggs with a tablespoon of water (this helps thin them for easier coating).
- Dish 3: Breadcrumbs mixed with Parmesan cheese.
Organization is key: Create an assembly line: chicken → flour → egg → breadcrumbs → a clean plate. This keeps one hand for dry ingredients and one for wet to avoid “club fingers.”
Step 4: The Dredge and Coat
Working with one cutlet at a time:
- Dredge in flour: Coat thoroughly, then shake off the excess.
- Dip in egg: Let the excess drip off.
- Press into breadcrumbs: Coat completely, pressing gently so the crumbs adhere. Lift and pat off any loose crumbs.
Place the breaded cutlet on a clean plate or wire rack. Repeat with remaining chicken. Let them rest for 10-15 minutes. This is the secret to a crust that doesn’t fall off!
Step 5: The Cook to Golden Perfection
In a large skillet (cast iron is ideal for even heat), heat the oil over medium-high heat until it shimmers. To test, flick a tiny breadcrumb in—it should sizzle gently.
Carefully add the cutlets (don’t crowd the pan; cook in batches if needed). Cook for 3-4 minutes per side, until the coating is a deep, golden brown and the chicken is cooked through (internal temperature of 165°F).
For the last 30 seconds, you can add butter to the pan and baste the cutlets for incredible flavor.
Step 6: The Essential Rest
Transfer cooked cutlets to a wire rack set over a baking sheet. Do not place them on paper towels or a plate! The rack allows air to circulate, keeping the bottom crust crisp. Let them rest for 5 minutes before serving.
The Great Cooking Method Debate: Pan-Fry, Bake, or Air Fry?
Pan-Frying (The Gold Standard):
- Best for: Ultimate crispiness, restaurant-quality results.
- Tip: Maintain oil temperature. If it smokes, it’s too hot.
Baking (The Hands-Off Approach):
- Method: Place breaded cutlets on a wire rack over a baking sheet. Spray lightly with oil. Bake at 400°F for 15-20 minutes, flipping halfway.
- Best for: Cooking a large batch with less mess.
Air Frying (The Modern Twist):
- Method: Spray basket with oil, add cutlets in a single layer. Lightly spray cutlets with oil. Cook at 375°F for 10-12 minutes, flipping halfway.
- Best for: A quicker, less-oil method that still delivers great crunch.
5 Incredible Variations to Keep Dinner Exciting
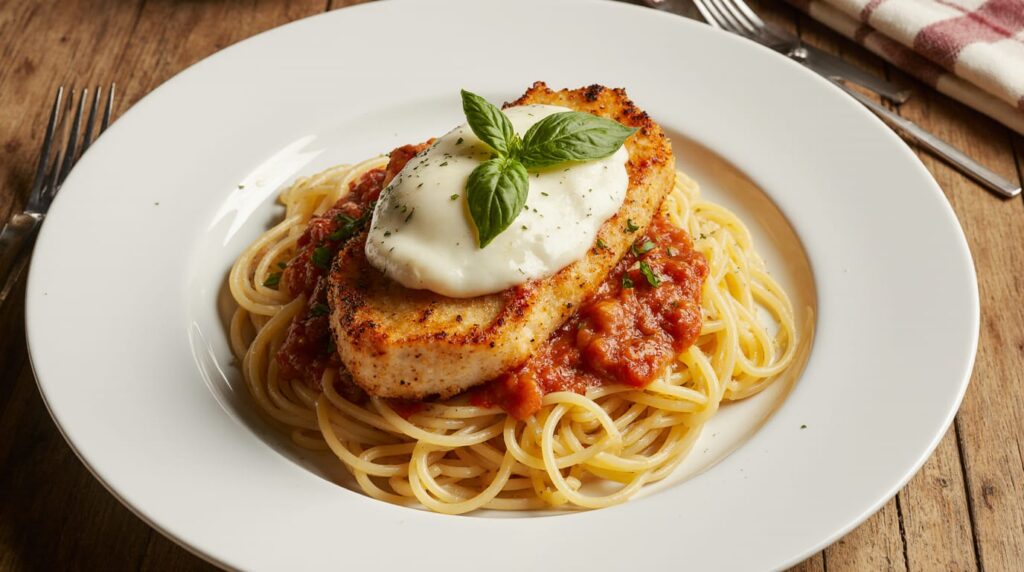
1. Chicken Parmesan:
Top cooked cutlets with marinara sauce and shredded mozzarella. Broil until bubbly. Serve over spaghetti.
2. Chicken Milanese:
Serve the classic cutlet over a simple arugula salad dressed with lemon juice and olive oil.
3. Buffalo Chicken Cutlet Sandwich:
Toss a hot cutlet in buffalo sauce. Serve on a toasted roll with blue cheese dressing, lettuce, and tomato.
4. Piccata-Style:
After removing the cutlets from the pan, add ½ cup white wine, juice of 1 lemon, and 2 tbsp capers to the skillet. Reduce by half, swirl in 2 tbsp butter, and pour over cutlets.
5. Greek-Style:
Mix oregano into the breadcrumbs. Serve cutlets with a dollop of tzatziki sauce, tomatoes, and red onion.
The Art of Serving: Building a Memorable Meal
Your perfect chicken cutlet deserves a great supporting cast:
- Classic Italian: With lemon wedges, a side of pasta aglio e olio, and a simple salad.
- Comfort Food: Mashed potatoes and roasted green beans.
- Light & Fresh: On top of a large Caesar salad.
- Sandwich Time: On a crusty roll with mayo, lettuce, and tomato.
Storing and Reheating: How to Keep That Crisp
To Store: Let cutlets cool completely. Store in an airtight container in the refrigerator for up to 3 days.
To Freeze: Place cooled cutlets in a single layer on a baking sheet to freeze solid, then transfer to a freezer bag for up to 3 months.
To Reheat (The Right Way):
- Oven/Toaster Oven: 350°F on a wire rack for 10-15 minutes.
- Air Fryer: 370°F for 4-5 minutes.
- Avoid the Microwave: It will turn the crust soggy.
Troubleshooting: Fixing Common Cutlet Catastrophes
“My breading fell off!”
- The oil wasn’t hot enough, or you didn’t let the breaded cutlets rest before frying.
“The outside is burnt but the inside is raw!” - The heat was too high, or the chicken was too thick. Pound evenly and maintain medium-high heat.
“My cutlets are soggy.” - They were stacked or placed on a plate while hot. Always use a wire rack. Also, don’t overcrowd the pan during cooking.
“They taste bland.” - You underseasoned the chicken itself. Season the meat, not just the breading.
Frequently Asked Questions (FAQs)
1. Can I use chicken thighs instead of breasts for this chicken cutlet recipe?
You can, but they will be richer and won’t pound as evenly. Thighs are more forgiving in terms of juiciness but have a different texture.
2. What’s the best substitute for breadcrumbs?
Panko breadcrumbs will give you an extra-crispy, flakier crust. For a gluten-free option, use crushed gluten-free crackers or certified gluten-free breadcrumbs.
3. How can I tell when the oil is ready for frying?
Use a thermometer (350°F is ideal). Without one, the handle of a wooden spoon dipped in the oil should produce steady, vigorous bubbles.
4. Can I prep the cutlets ahead of time?
Yes! You can bread the cutlets and refrigerate them on a wire rack for up to 4 hours before cooking. This can actually help the coating set better.
5. Why do you use a wire rack instead of paper towels?
Paper towels trap steam, making the bottom crust soggy. A wire rack allows air to circulate, keeping the entire cutlet crisp.
6. What’s the best oil for frying chicken cutlets?
An oil with a high smoke point and neutral flavor. Avocado, canola, or vegetable oil are all excellent choices. Olive oil can be used for a lower heat cook but may smoke at high temperatures.
7. How thin should I really pound the chicken?
Aim for ¼-inch thickness. This ensures quick, even cooking and the classic cutlet texture. Any thicker and the coating may burn before the chicken cooks through.
Conclusion: Your Journey to Cutlet Mastery Starts Now
Look at that—you’re now armed with more than just a chicken cutlet recipe. You have a set of fundamental techniques that will ensure juicy, crispy success every single time. This isn’t about blindly following steps; it’s about understanding the why behind each one.
The true beauty of mastering this chicken cutlet recipe is its ripple effect. It builds kitchen confidence. Once you can perfectly bread and cook a cutlet, a world of recipes opens up—from schnitzel to tonkatsu to katsu sandos. You’re not just making dinner; you’re building a skill.
So, grab that meat mallet, set up your breading station, and get ready for the crispiest, most satisfying chicken of your life. Your family is about to be very, very impressed.
I can’t wait to see your results! Which variation did you try first? Do you have a family twist on the classic recipe? Share your stories, photos, and questions in the comments below—let’s build a community of cutlet connoisseurs!