Introduction: The Cookie That Stole My Heart
You know those cookies that disappear within hours of coming out of the oven? The ones your family pretends they don’t want seconds of—while sneaking back into the kitchen when they think you’re not looking?
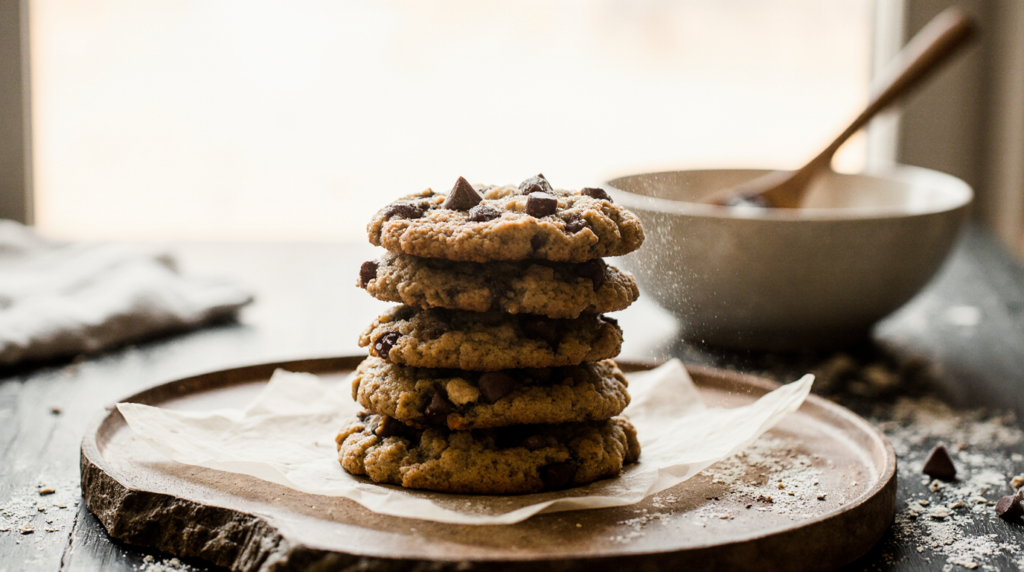
For me, that cookie is chocolate chip oat cookies.
I still remember the first time I nailed them. It was a rainy Saturday afternoon, my kitchen was a glorious mess of flour-dusted countertops, and I pulled a baking sheet from the oven to reveal golden-edged rounds studded with melted chocolate and hearty oats. My husband took one bite, closed his eyes, and said the words every home baker longs to hear: “These are the best cookies you’ve ever made.”
Here’s the beautiful truth about chocolate chip oat cookies: they’re remarkably forgiving. Unlike their temperamental cousin, the delicate French macaron, these cookies welcome beginners with open arms. They don’t care if your butter isn’t perfectly softened. They forgive a heavy hand with the chocolate chips. They understand that life is busy and sometimes you just need a batch of warm, chewy comfort without a culinary degree.
In this guide, I’m sharing everything I’ve learned from countless batches—the good, the slightly burnt, and the absolutely perfect. Whether you’re holding a wooden spoon for the first time or you’re a seasoned baker looking to refine your technique, you’re in the right place.
Let’s bake something beautiful together.
Why Chocolate Chip Oat Cookies Deserve a Spot in Your Recipe Box
Before we dive into techniques, let’s talk about why these cookies are worth mastering.
They’re textural perfection. All-purpose flour gives structure, but oats bring something entirely different—a hearty, satisfying chew that makes each bite feel substantial without being heavy. When you sink your teeth into a well-made oat chocolate chip cookie, you get that initial delicate crispness at the edges, then a soft, almost buttery center, and finally the gentle resistance of rolled oats. It’s a symphony of textures .
They’re nutritionally friendlier. Oats add fiber, protein, and complex carbohydrates. While I’d never call cookies health food, swapping some refined flour for whole grains means you’re getting a bit more staying power. Several recipe variations even use coconut oil or reduce sugar without sacrificing taste .
They’re endlessly adaptable. The basic chocolate chip oat cookies template welcomes creativity. Add shredded coconut for tropical sweetness . Toss in chopped walnuts or pecans for crunch. Swap semi-sweet chips for dark chocolate, white chocolate, or butterscotch. Dried cranberries? Crystallized ginger? Cinnamon? Yes, yes, and yes .
They freeze like champions. This might be my favorite feature. You can make a double batch on Sunday, bake half, and freeze the remaining dough in pre-portioned balls. Two weeks later, when you’re exhausted and craving something homemade, you can bake fresh cookies in under fifteen minutes .
Secret #1: Master the Creaming Method (It’s Not Just Mixing!)
Let’s talk about the single most important technique in cookie baking.
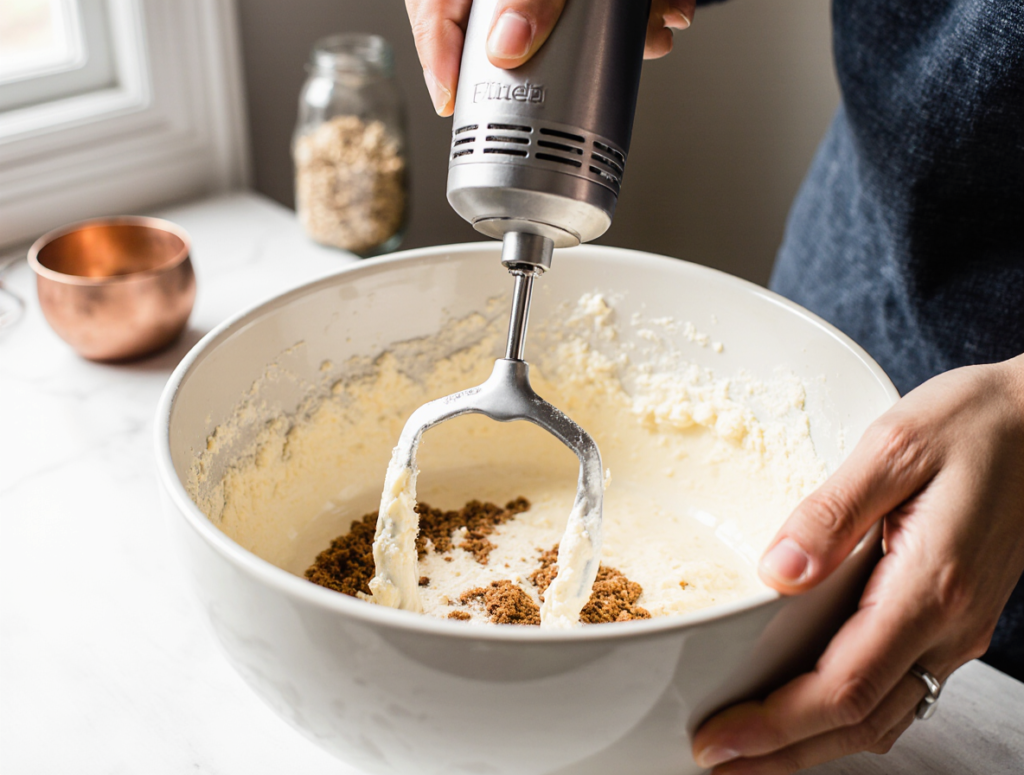
When a recipe instructs you to “cream together the butter and sugars until light and fluffy,” that’s not optional fluff—it’s the foundation of everything good that follows. Professional bakers cream for five to seven minutes . That might feel excessive when you’re standing there holding a mixer, but trust the process.
Here’s what’s happening during those minutes: the sugar crystals are cutting tiny air pockets into the butter. Those air pockets expand in the oven, giving your cookies lift and tenderness. Under-creamed dough produces dense, flat cookies. Properly creamed dough yields cookies that rise beautifully and melt in your mouth .
Beginner pro tip: Your butter should be softened—pliable enough to hold a thumbprint, but not so soft it’s greasy or melting. If you forgot to take it out of the fridge, cut it into tablespoon-sized pieces and microwave in five-second bursts, rotating frequently. You want yielding, not liquid.
Secret #2: Choose Your Oats Wisely
This is where many beginners get tripped up, and honestly, even experienced bakers have strong opinions.
Old-fashioned rolled oats are the gold standard for chocolate chip oat cookies. They’re flat, wide, and maintain their shape during baking. Each oat stays distinct, giving you that satisfying chew and hearty texture .
Quick oats are cut into smaller pieces during processing. They’ll work in a pinch, and some bakers prefer the more uniform texture they create. However, your cookies will be softer and less distinctly “oaty.” One recipe explicitly recommends against quick-cooking oats for this very reason .
Steel-cut oats? Save these for breakfast porridge. They won’t soften sufficiently during the short baking time.
My recommendation: Splurge on a good quality rolled oat. Your cookies will thank you.
Secret #3: To Chill or Not to Chill?
Ask five bakers about chilling cookie dough, and you’ll get seven opinions.
Some recipes insist that chocolate chip oat cookies require at least one hour of refrigeration . Others proudly advertise “no chill time required!” . Who’s right?
Here’s the honest truth: It depends on your priorities.
Chilling delivers:
- Thicker, taller cookies that spread less
- More concentrated, complex flavor as ingredients meld
- Better browning on edges
- Dough that’s easier to portion
Skipping the chill delivers:
- Dinner in 20 minutes instead of 2 hours
- Slightly thinner, lacier cookies (which some people prefer!)
- Zero advance planning required
The recipe I’m sharing below offers both paths. If you have time, chill the dough. If you need cookies right now, bake immediately. Both outcomes are delicious—they’re just different .
Secret #4: Don’t Overmix (Seriously, Stop While You’re Ahead)
Once you add the flour mixture to the wet ingredients, something shifts. Overmixing develops gluten—the protein network that gives bread its satisfying chew. That’s wonderful for sourdough. It’s catastrophic for tender cookies .
The visual cue: Mix just until you can no longer see dry flour. A few streaks are okay. Then stop. Immediately.
When you add the chocolate chips, fold them in gently with a spatula. Three or four turns. Done.
Overmixed dough produces tough, dense, almost bread-like cookies. Undermixed dough yields tender, delicate, irresistible cookies. Err on the side of undermixed.
Secret #5: Storage Secrets from a Professional Baker
You’ve baked the perfect batch. Now what?
I reached into the wisdom of Erin Clarkson, the baker behind Cloudy Kitchen, who shared her expert storage strategies with Martha Stewart. Her advice transformed how I handle leftover cookies .
Cool completely before storing. This is non-negotiable. “If they’re even a little warm, the residual steam can make them soggy,” Clarkson explains. Patience pays off .
Choose the right container. That beautiful ceramic cookie jar on your counter? It’s probably not airtight. Clarkson recommends plastic or glass containers with tightly fitting lids. For extra protection, layer parchment paper between cookie layers to prevent sticking .
The white bread trick—use carefully. Yes, storing cookies with a slice of bread adds moisture and softens them. But this works best for chewy cookies you want tender. Don’t do this with crispy cookies, and don’t expect miracles after several days .
Never mix cookie types. Soft cookies will make crispy cookies soggy. Crispy cookies will draw moisture from soft cookies. Store them separately to maintain each batch’s intended texture .
Revive stale cookies. A 300°F oven for five minutes works wonders. This won’t rescue week-old rocks, but day-old slightly-stale cookies become warm and almost-fresh again .
The Foolproof Recipe: Classic Chocolate Chip Oat Cookies
After testing variations from multiple sources , I’ve developed this hybrid recipe that balances chewiness, crisp edges, and chocolate distribution. It’s beginner-proof and absolutely delicious.
Prep Time: 15 minutes
Chill Time: Optional, 30-60 minutes
Bake Time: 10-15 minutes
Yield: 18-24 cookies
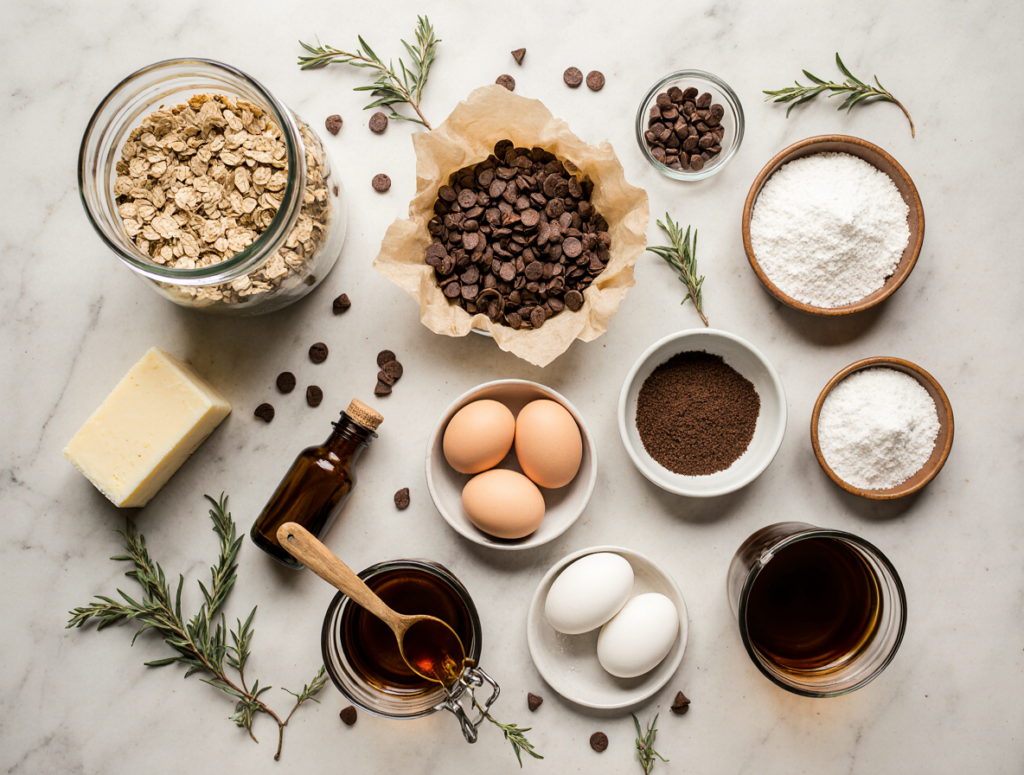
Ingredients
| Amount | Ingredient | Notes |
|---|---|---|
| 1 cup (2 sticks) | Unsalted butter | Softened |
| ¾ cup | Brown sugar | Packed |
| ¼ cup | Granulated sugar | |
| 2 large | Eggs | Room temperature |
| 1 tbsp | Vanilla extract | Yes, a full tablespoon! |
| 1½ cups | All-purpose flour | Spooned and leveled |
| 1 tsp | Baking soda | |
| ½ tsp | Baking powder | |
| ½ tsp | Salt | |
| 1 tsp | Cinnamon | Optional, but wonderful |
| 2 cups | Old-fashioned rolled oats | |
| 1-1½ cups | Semi-sweet chocolate chips | Or your favorite variety |
Instructions
Step 1: Preheat and prepare.
Preheat your oven to 350°F (175°C). Line two baking sheets with parchment paper.
Step 2: Cream butter and sugars.
In a large bowl, beat the softened butter, brown sugar, and granulated sugar until light and fluffy. This takes about 3-5 minutes with an electric mixer. Scrape down the bowl once or twice .
Step 3: Add wet ingredients.
Beat in the eggs one at a time, then stir in the vanilla extract. The mixture should look smooth and slightly glossy .
Step 4: Combine dry ingredients.
In a separate bowl, whisk together the flour, baking soda, baking powder, salt, and cinnamon (if using). Whisking ensures even distribution of leavening agents .
Step 5: Mix wet and dry.
Gradually add the dry ingredients to the wet mixture. Mix on low speed or fold gently with a spatula until just combined. A few flour streaks are okay .
Step 6: Add oats and chocolate chips.
Fold in the rolled oats until evenly distributed, then gently fold in the chocolate chips. Do not overmix .
Step 7: Chill (optional but recommended).
For thicker, chewier cookies, cover the bowl and refrigerate for at least 30 minutes, up to overnight. For immediate baking, proceed to the next step .
Step 8: Scoop and shape.
Drop rounded tablespoonfuls of dough onto prepared baking sheets, spacing them about 2 inches apart. For that bakery look, press a few extra chocolate chips onto the tops of each dough ball .
Step 9: Bake.
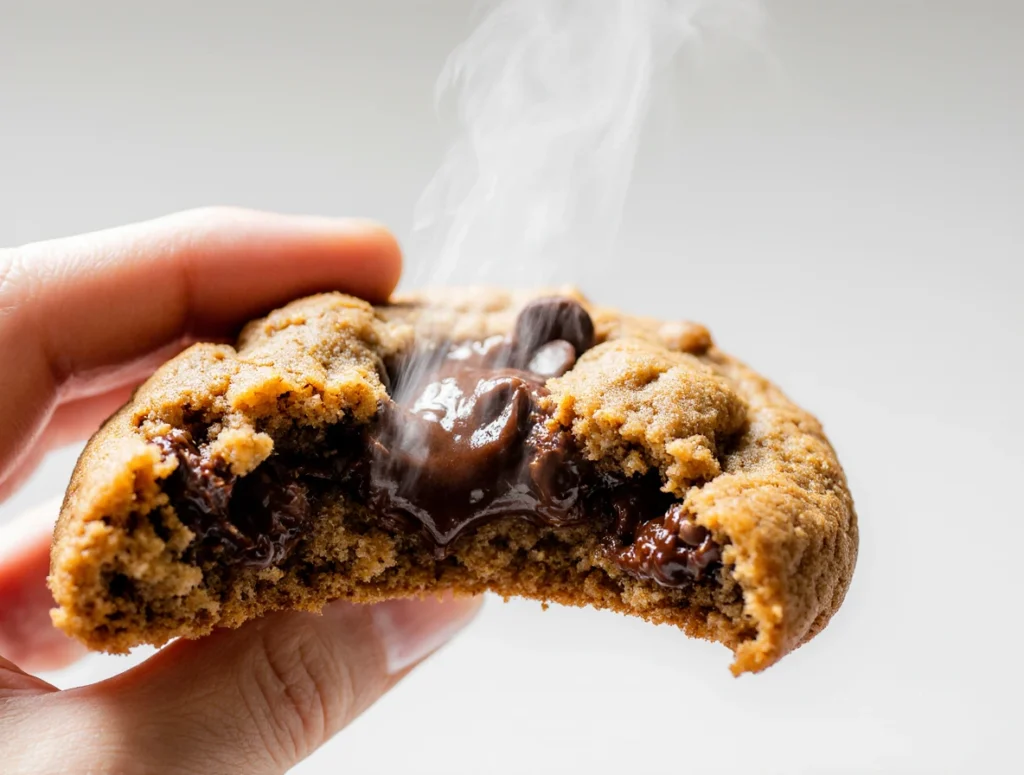
Bake for 10-15 minutes, depending on your desired doneness:
- 10-12 minutes: Softer, gooier centers
- 12-14 minutes: Perfectly balanced—golden edges, soft middles
- 14-15 minutes: Crisper edges, fully set centers
Step 10: Cool.
Let cookies rest on the baking sheet for 5 minutes. This allows them to set without breaking. Then transfer to a wire rack to cool completely—or enjoy warm with a tall glass of milk .
Delicious Variations to Make the Recipe Your Own
Once you’ve mastered the basic chocolate chip oat cookies, experimentation awaits.
Coconut Chocolate Chip Oat Cookies: Add ¾ cup unsweetened shredded coconut along with the oats. Toast the coconut beforehand for extra depth .
Spiced Oat Cookies: Increase cinnamon to 1½ teaspoons and add ½ teaspoon nutmeg and ¼ teaspoon cloves. Perfect for autumn baking.
Trail Mix Cookies: Reduce chocolate chips to ½ cup, add ½ cup chopped walnuts or pecans, and ¼ cup dried cranberries or cherries.
Brown Butter Oat Cookies: Brown the butter before using, then cool it slightly before creaming with sugars. The nutty, caramelized flavor elevates the entire cookie .
Gluten-Free Adaptation: Substitute a high-quality 1:1 gluten-free flour blend. Many blends work beautifully in this recipe .
Frequently Asked Questions About Chocolate Chip Oat Cookies
Q1: Why did my cookies turn out flat?
Flat cookies usually result from one of three issues. First, butter that’s too soft or melted won’t hold air during creaming . Second, insufficient creaming time means fewer air pockets for lift. Third, skipping the chilling step allows butter to melt too quickly in the oven. For thicker cookies, chill that dough!
Q2: Why are my cookies dry and crumbly?
The culprit is almost always too much flour or overbaking. Measure flour correctly by spooning it into your measuring cup and leveling with a knife—never scoop directly with the cup, which packs flour tightly. For overbaking, try pulling the cookies when edges are golden but centers still look slightly underdone. They’ll continue baking on the hot sheet .
Q3: Can I use quick oats instead of old-fashioned oats?
Yes, but expect different results. Quick oats produce a softer, more uniform cookie with less distinct oat texture. If you love hearty, chewy chocolate chip oat cookies, stick with old-fashioned rolled oats .
Q4: How do I keep my cookies soft for days?
Store completely cooled cookies in an airtight container at room temperature. Add a slice of sandwich bread to the container—it releases moisture that keeps cookies tender. Replace the bread slice every day or two .
Q5: Can I freeze the cookie dough?
Absolutely! This is one of my favorite meal-prep strategies. Scoop dough into balls, arrange on a parchment-lined baking sheet, and freeze until solid. Transfer frozen dough balls to a freezer bag. Bake directly from frozen, adding 2-3 minutes to the baking time. Fresh cookies whenever you want them .
Q6: What’s the best chocolate for oat cookies?
High-quality semi-sweet chips are classic, but don’t be afraid to experiment. Dark chocolate (60-70% cacao) balances beautifully with hearty oats. Chocolate chunks create glorious melted pools. For something different, try white chocolate or butterscotch chips .
Q7: How long will these cookies stay fresh?
Stored properly in an airtight container at room temperature, chocolate chip oat cookies remain delicious for 3-5 days. For longer storage, freeze baked cookies for up to 3 months .
Conclusion: Your Cookie Journey Starts Now
Here’s what I hope you take away from this guide: chocolate chip oat cookies aren’t just a recipe—they’re an invitation.
An invitation to slow down on a Saturday afternoon and fill your kitchen with warmth and vanilla-scented steam. An invitation to share something handmade with people you love. An invitation to trust yourself, make mistakes, learn, and try again.
The recipe above works. I’ve tested it, dozens of bakers have tested it, and it delivers consistently delicious results. But more important than any single recipe is the confidence you’ll build as you practice. Each batch teaches you something: how your oven behaves, what “softened butter” really looks like, how much chocolate is actually enough (spoiler: it’s always more than you think).
So preheat that oven. Dig out your favorite mixing bowl. Let butter soften on the counter. And when you pull that first sheet of golden, oat-flecked, chocolate-studded cookies from the oven, take a moment to appreciate what you’ve created.
Then eat one warm. You’ve earned it.
Now I want to hear from you! What’s your favorite addition to chocolate chip oat cookies—walnuts, coconut, extra cinnamon? Have you tried the recipe? Share your baking triumphs (and hilarious failures) in the comments below. Your story might be exactly what another beginner needs to hear today.
Loved this guide? Pin it to your baking board on Pinterest, share it with a friend who deserves better cookies, or check out our Ultimate Guide to Chewy Chocolate Chip Cookies for more beginner-friendly baking wisdom. Happy baking! 🍪