Introduction: Unwrapping a Candy Bar Dream
Let’s be honest for a second. You’re standing in the candy aisle, eyeing that familiar dark blue wrapper. You love the rich, dark chocolate and the sweet, chewy coconut center of a Mounds bar, but maybe you’re watching the sugar, curious about the ingredients, or just itching for a fun kitchen project. What if I told you that you could create something even more delicious—and deeply satisfying—right in your own kitchen?
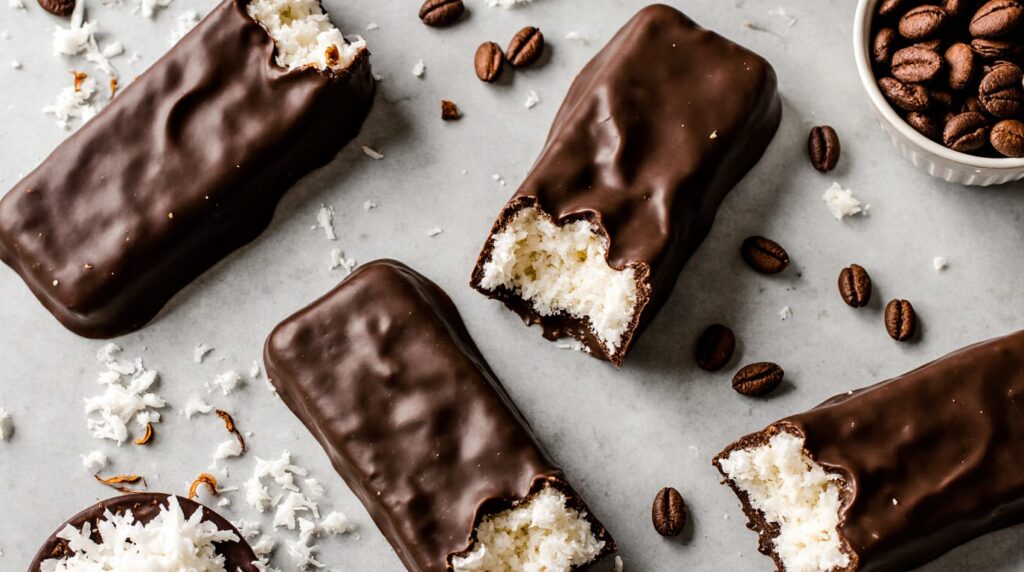
Welcome to the wonderfully simple world of Homemade Mounds Bars. This isn’t just about replicating a candy bar; it’s about crafting a treat where you control the quality of every single bite. No mystery ingredients, no preservatives—just pure, coconut-chocolate bliss that comes together with surprisingly little effort. Whether you’re a baking newbie or a seasoned pro looking for a quick win, these recipes will show you just how easy and rewarding it is to make these iconic treats from scratch. Let’s get your hands a little coconutty and create some magic.
Homemade Mounds Bars
Ingredients
Equipment
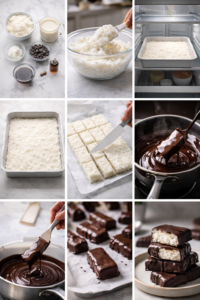
Method
- Line a baking dish with parchment paper and set aside.
- In a mixing bowl, combine shredded coconut, sweetened condensed milk, and vanilla extract until fully mixed.
- Press the coconut mixture firmly into the prepared dish, creating an even layer.
- Refrigerate for at least 1 hour, until firm.
- Melt dark chocolate chips with coconut oil over low heat or in the microwave, stirring until smooth.
- Cut the chilled coconut mixture into bars.
- Dip each bar into the melted chocolate, coating evenly.
- Place bars back onto parchment paper and refrigerate until chocolate is set.
- Serve chilled or at room temperature.
Notes
- Use unsweetened coconut for a less sweet version.
- Milk chocolate can be used instead of dark chocolate.
- Store in an airtight container in the fridge for up to 7 days.
Homemade Mounds Bars FAQs
Q1: Can I use sweetened shredded coconut instead?
You can, but your bars will be significantly sweeter. If you do, you may want to slightly reduce the amount of sweetened condensed milk. Start with ¾ of the can, mix, and only add more if the mixture isn’t holding together.
Q2: Why did my chocolate coating get thick and clumpy?
Your chocolate likely “seized,” often caused by a single drop of water or steam getting into it while melting. Always ensure all tools are completely dry. If it seizes, you can sometimes rescue it by vigorously stirring in a tiny amount of neutral oil (like more coconut oil) until it smooths out again.
Q3: Are there any dairy-free options for Homemade Mounds Bars?
Yes! You can experiment by substituting the sweetened condensed milk with a thick, reduced homemade mixture of full-fat coconut milk and sugar, or use a store-bought dairy-free sweetened condensed coconut milk alternative. The texture may vary slightly, but the flavor will be fantastic.
Q4: How do I get that professional-looking chocolate coating?
The frozen center trick is 90% of the battle. Using the coconut oil shortcut and good-quality chocolate makes up the other 10%. Don’t skip the freezing step!
Q5: Can I use chocolate almond bark or candy melts?
Absolutely. These are designed for easy coating and setting, making them a very beginner-friendly option. They come in dark, milk, and white chocolate flavors. Follow the package instructions for melting.
Conclusion: Your Sweet Signature Awaits
Making Homemade Mounds Bars is more than a recipe—it’s a delicious proof that you can create classic treats with your own two hands. The process is simple, the results are impressive, and the ability to tweak them to your exact preference is the real reward.
So, grab that bag of coconut and that bar of chocolate. Embrace the simple joy of mixing, shaping, and dipping. I promise, the taste of your own creation, rich with dark chocolate and sweet coconut, will make that candy aisle feel a million miles away.
I’d love to hear how your candy-making adventure goes! Which variation did you try? Did you discover any brilliant tips of your own? Share your stories (or photos!) in the comments below. And if you enjoyed this guide, please pass it on to a fellow sweet tooth—sharing is caring!
find more desserts recipes here !!