Remember that pure, simple joy of childhood? The kind you got from sinking your teeth into something sweet, crunchy, and impossibly easy to love? That’s exactly the feeling you get with peanut butter Rice Krispie balls.
These aren’t just another dessert; they’re a edible hug. A perfect, no-bake, three-ingredient wonder that has saved countless parents from last-minute bake sales, provided the ideal afternoon snack, and become a nostalgic staple for good reason. If you’ve never made them before, you’re in for the easiest, most satisfying kitchen win of your life. Let’s turn that familiar snap, crackle, pop into delicious, bite-sized bliss.
Why Peanut Butter Rice Krispie Balls Deserve a Spot in Your Recipe Box
Before we grab the marshmallows, let’s talk about why this recipe is a certified superstar, especially for beginners.
- The Ultimate No-Bake Recipe: No oven, no fuss, no complicated techniques. If you can melt butter and stir, you’re a master chef in the making. It’s the perfect introduction to the world of homemade treats.
- A Crowd-Pleasing Hero: From kids to grandparents, it’s nearly impossible to find someone who doesn’t light up when offered one of these sweet, peanut buttery spheres. They are a guaranteed hit at parties, potlucks, or as a lunchbox surprise.
- Endlessly Customizable: Think of the basic recipe as a blank canvas. Once you’ve mastered it, you can roll them in sprinkles, dip them in chocolate, or mix in different cereals. The possibilities are as fun as you want them to be.
- Quick & Economical: You can have a full batch ready to eat in under 20 minutes, using affordable pantry staples you probably already have.
🥜 Peanut Butter Rice Krispie Balls
Ingredients
Equipment
Method
- In a mixing bowl, combine peanut butter and honey until smooth.
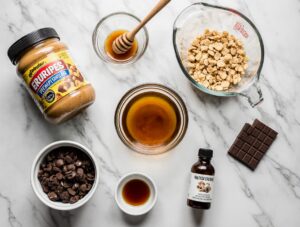
- Stir in vanilla extract and salt.
- Add Rice Krispies cereal and gently fold until fully coated.
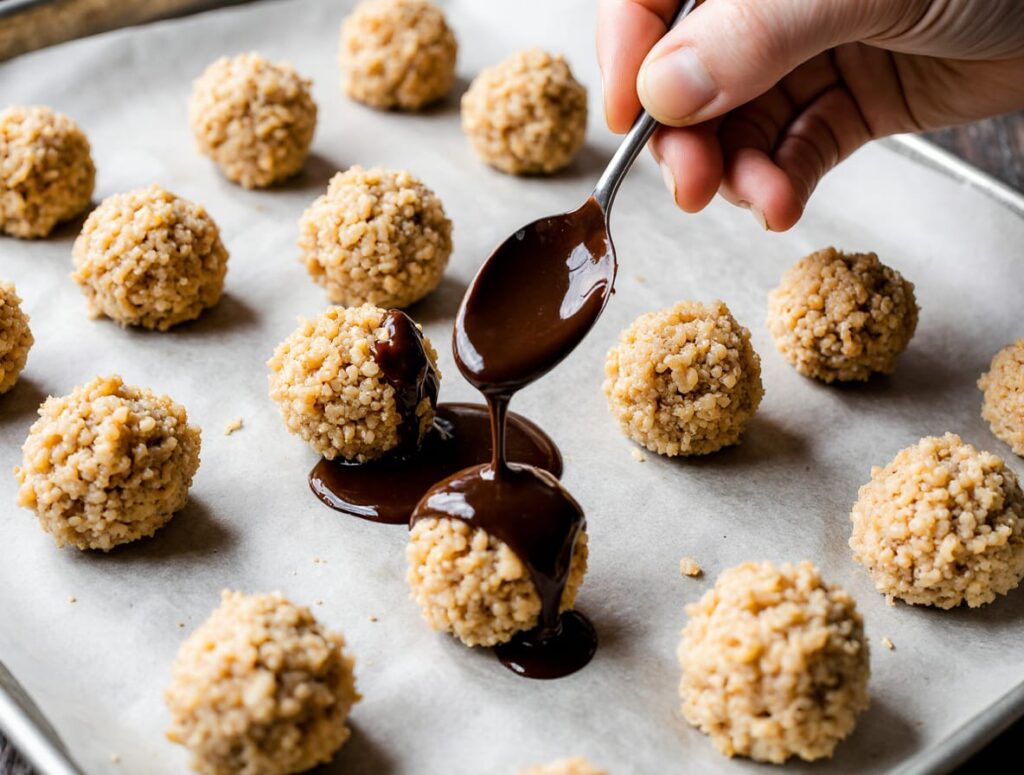
- Scoop the mixture and roll into bite-sized balls.
- Place balls on a parchment-lined tray.
- Drizzle or dip in melted chocolate if using.
- Refrigerate for 30 minutes until firm.
- Serve chilled or at room temperature.
Notes
- Use crunchy peanut butter for extra texture.
- Store in an airtight container in the fridge for up to 1 week.
- Can be made dairy-free by skipping the chocolate.
Your Peanut Butter Rice Krispie Balls FAQs
Q1: Can I use natural peanut butter?
I recommend against it for your first batch. The oils in natural peanut butter don’t bind as well, often leading to crumbly balls. Stick with a conventional, stabilized brand for guaranteed success. For more on peanut butter types, the National Peanut Board is a great resource.
Q2: How do I store them, and how long do they last?
Store them in a single layer (or layered with parchment paper between) in an airtight container at room temperature. They are best eaten within 2-3 days, as the cereal will start to lose its signature snap over time.
Q3: Can I make these ahead of time for a party?
Absolutely! They are the perfect make-ahead treat. Just store them as directed. You can also shape the balls and then dip them in chocolate the day of your event for the freshest presentation.
Q4: My mixture is too hard/crumbly to roll. What happened?
This usually means the marshmallow mixture cooled down too much before you shaped the balls. Next time, work a bit faster, and don’t let the mixed cereal sit for more than a minute or two before rolling. If it happens, you can gently re-warm the entire mixture in the pot over very low heat for a few seconds to make it pliable again.
Q5: Are there any nut-free alternatives?
Yes! For a nut-free version, you can substitute the peanut butter with an equal amount of sunflower seed butter (like SunButter). The flavor is different but delicious, and it creates the same perfect, no-bake texture.
The Sweet Conclusion: Your No-Bake Journey Starts Now
See? I told you it was easy. In less time than it takes to watch a sitcom, you can create a treat that brings smiles, satisfies sweet cravings, and makes you feel like a kitchen rockstar. The humble peanut butter Rice Krispie ball is proof that the best things in life don’t have to be complicated.
So, what will you try first? The classic, the chocolate-dipped, or a wildcard mix-in? I’d love to see your creations! Snap a photo of your batch and share it in the comments below, or tell us your favorite no-bake dessert. And if you’re hooked on the no-bake life, why not try our classic Triple Chocolate Cookies next?
Happy cooking, and enjoy every last snap, crackle, pop!